
Taking long exposure photos on an iPhone is easier than many think, and it opens up new creative possibilities without needing expensive equipment. The key to capturing long exposure images on an iPhone is using the Live Photos feature combined with a few simple steps in the Camera app. This technique allows users to create smooth, artistic effects like light trails and soft motion with just their phone. Even older iPhone models can produce impressive long exposure shots by using built-in settings or third-party apps designed for this purpose. By understanding how to prepare and adjust the camera settings, anyone can start experimenting and get professional-looking results with minimal effort.
Understanding Long Exposure Photography
Long exposure captures motion by keeping the camera’s sensor open for a longer time. This technique shows movement in ways regular photos cannot. It helps highlight light trails, smooth water, and busy scenes clearly on an iPhone.
What Is Long Exposure
Long exposure photography means the camera’s shutter stays open longer than usual. This allows more light to hit the sensor over time. Moving subjects blur or streak, while still objects remain sharp. On an iPhone, long exposure can be done by using the Live Photos mode or special apps. The camera records a few seconds of motion, combining frames into one photo with motion effects.
Benefits of Long Exposure on iPhone
Using long exposure on an iPhone creates unique images with effects like blurred motion or glowing lights. It is simple and doesn’t need extra equipment. The iPhone’s built-in tools let users capture scenes like flowing water or moving traffic with smooth trails. It also enhances low-light photos by gathering more light during the shot. Long exposure boosts creativity, allowing people to experiment and capture moments beyond normal snapshots. It is accessible for beginners and adds new styles to iPhone photography.
When to Use Long Exposure
Long exposure is ideal in low-light or night scenes to show movement or light paths clearly. It works well for waterfalls, rivers, city streets, or stars. It helps capture dynamic scenes where motion tells a story, like cars on highways or people walking. Avoid using it for fast action where clear detail is needed, since moving subjects will blur. Using a tripod or steady surface improves results by keeping the camera still during the longer exposure time.
Preparation Before Shooting Long Exposure
Capturing sharp, clear long exposure photos requires careful setup and the right tools. Stability, device capability, and software all play important roles in achieving the desired effect.
Essential Equipment for Steady Shots
Long exposure photos need a steady iPhone to avoid blurring the entire image. A tripod is the most reliable option. It keeps the phone still throughout the exposure time, especially when using slow shutter speeds. If a tripod is not available, placing the phone on a stable surface like a wall or table can help. Using a remote shutter or the iPhone’s timer reduces shake caused by touching the screen to take the picture. For low-light or night shots, a steady setup becomes even more critical as exposure times get longer, sometimes several seconds or more.
Choosing the Right iPhone Model
Not all iPhones handle long exposure equally well. Devices with latest camera sensors and image processing chips perform better. Models from the iPhone 11 and later use advanced software and hardware that improve low-light capture and reduce noise. These newer models also support Live Photos, which can be converted into long exposure images directly in the Photos app after taking the shot. Older iPhones may still use third-party apps for long exposure, but the results won’t be as smooth or clear as on newer models with better image stabilization and sensor sensitivity.
Recommended Apps for Long Exposure
Although the iPhone’s built-in Photo app allows long exposure through Live Photos, several apps offer more control. Apps like Slow Shutter Cam, ProCam, and Camera+ let users adjust exposure time, ISO, and shutter speed manually.
These apps often include features like:
- Interval shooting
- Motion blur control
- Noise reduction
Using such apps provides flexibility to experiment with different exposure lengths and improve the final photo quality. Users should check app updates to ensure compatibility with the latest iOS version.
How to Capture Long Exposure Using iPhone Live Photos
Capturing long exposure photos on an iPhone involves turning on Live Photos, taking the shot, and then applying the long exposure effect. This method uses motion data stored in the photo to create a blur effect in moving parts while keeping still parts sharp.
Enabling Live Photos
First, the user must make sure the Live Photos feature is enabled in the Camera app. This is done by opening the Camera and tapping the circular icon with concentric rings at the top of the screen. When enabled, the icon will appear yellow. Enabling Live Photos allows the phone to record a short video snippet before and after the photo is taken. This data is essential for creating a long exposure effect later. If Live Photos is turned off, the option to create a long exposure image will not be available after the photo is captured.
Taking a Live Photo for Long Exposure
After enabling Live Photos, the user should frame the shot like a normal photo. It’s best to capture subjects with some motion, such as flowing water, moving clouds, or traffic.
Steady the iPhone during the shot to avoid unwanted blur outside the moving parts. Tap the shutter button once to take the Live Photo.
The iPhone captures a short video clip along with the still image. This clip is needed to apply the long exposure effect after.
Applying the Long Exposure Effect
Once the Live Photo is taken, open the Photos app and find the image.
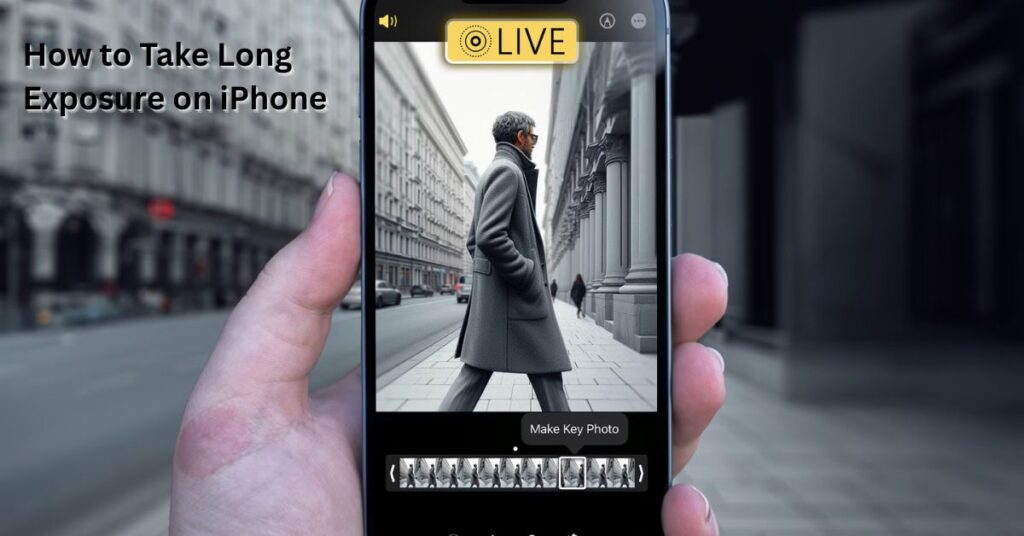
Swipe up on the photo or tap the “Live” button above it to view Live Photo effects.
Select the “Long Exposure” effect from the list. The iPhone will process the motion data from the Live Photo to simulate a long exposure blur.
The effect blurs moving areas while keeping static parts sharp, adding visual interest without needing special gear.
If the result is not what is expected, the user can revert to the original Live Photo by selecting “Live” instead of “Long Exposure.”
Using Third-Party Apps for Enhanced Long Exposure
Third-party apps give users more control over long exposure settings than the native iPhone camera. They allow adjustments like shutter speed, ISO, and focus to capture effects such as light trails and motion blur. These apps are essential for those seeking professional-style photos with longer exposure times.
Best Third-Party Apps for iPhone
Some popular apps for long exposure on iPhone include Slow Shutter Cam, ProCam, and Spectre Camera. Slow Shutter Cam offers manual shutter control and three shooting modes: motion blur, light trail, and low light. ProCam supports shutter speeds up to 30 seconds and adds features like ISO and white balance control. Spectre Camera uses AI to create smooth light trails and reduce noise.
Each app offers different tools for exposure length, ISO, and focus control. Users should try a few to find the one that fits their style and desired level of manual control.
Manual Camera Settings Overview
Long exposure photography depends on controlling shutter speed, ISO, and focus.
- Shutter Speed controls how long the camera sensor collects light. Longer times create blurred motion.
- ISO affects the sensor’s sensitivity to light. Lower ISO means less noise in photos.
- Focus ensures sharpness on the subject while motion appears blurred.
Third-party apps let users set the shutter speed from 1 second to 30 seconds or more. Setting ISO to the lowest possible value reduces grain in dark areas. Manual focus is important to keep the subject sharp while capturing motion effects.
Capturing Light Trails and Motion Blur
Light trails appear when moving light sources, like cars or stars, are photographed with long exposure. Motion blur happens when objects, such as waterfalls or people, move during the shutter open time.
To capture light trails or motion blur:
- Use a tripod to keep the iPhone steady.
- Set a long shutter speed, usually several seconds.
- Keep ISO low to prevent grain.
- Use manual focus to keep still subjects sharp.
Third-party apps allow adjusting these settings easily. This control helps create clear light trails and smooth motion effects, which are hard to achieve with the iPhone’s default camera.
Optimizing Settings for Best Results
To get sharp and clear long exposure photos on an iPhone, certain camera settings must be carefully controlled. Exposure time, ISO, and focus all affect how the final image looks. Using external tools to keep the phone steady also improves photo quality significantly.
Adjusting Exposure Time
Exposure time controls how long the camera’s sensor collects light. For long exposure shots, a longer exposure captures movement as blur, while keeping still parts sharp. iPhone users rely on the Live Photo feature to simulate longer exposures since the native app doesn’t let them manually set seconds for exposure.
After taking a Live Photo, swiping up reveals effects including “Long Exposure.” This option blends multiple frames over a second or two to create the blur effect. Using third-party apps can allow more precise control over exposure time, sometimes up to several seconds, depending on the app and iPhone model.
Selecting the right exposure length depends on subject movement and light conditions. Faster motion requires shorter exposure to avoid excessive blur. For dim environments, longer exposure lets in more light but needs stability.
Managing ISO and Focus
ISO controls the camera sensor’s sensitivity to light. On iPhones, ISO adjusts automatically, but some third-party apps provide manual control. Lower ISO values reduce image noise and grain but require more light or longer exposure.
Handling focus is important to keep the main subject sharp. The iPhone usually autofocuses, but tapping on the screen to set focus manually works well, especially in low light. Locking focus after setting it prevents the camera from refocusing during the shot, which can blur the image.
Adjusting both ISO and focus helps the phone take clearer photos during long exposure. Lower ISO and locked focus contribute to improved sharpness and less noise, balancing the blur effect from motion.
Utilizing Tripods and Stabilizers
Stability is critical for long exposure photos. Even tiny movements cause blurriness. Using a tripod or stabilizer keeps the iPhone steady throughout the exposure time.
Several affordable tripods fit smartphones and provide strong support. A tripod with adjustable legs helps position the iPhone at the perfect angle and height.
If a tripod isn’t available, resting the phone on a solid surface reduces shake. Remote shutter buttons or the iPhone’s timer also help by preventing hand movement while tapping the shutter.
In shaky environments, combining a tripod with a stabilizer offers the best results. This keeps the phone both still and secure against vibrations.
Creative Ideas for Long Exposure on iPhone
Long exposure photos can highlight movement and light in unique ways. Using an iPhone, the photographer can turn simple scenes into dynamic images by focusing on motion and light trails. Different settings, lighting conditions, and subjects create various creative effects.
Capturing Water and Clouds
Water and clouds are ideal subjects for long exposure. Moving water appears smooth and silky, turning rough waves or flowing rivers into soft, dreamlike textures. Clouds blur across the sky, adding a sense of motion and passage of time.
To get clear shots, the iPhone must be steady. Use a tripod or place the phone on a solid surface. Shooting near waterfalls, rivers, or oceans works well during the day with bright light. For clouds, late afternoons or early mornings provide interesting lighting and more movement.
City Lights and Traffic Trails
Urban scenes let photographers capture bright light trails from cars and streetlights. Long exposure can turn busy city streets into glowing lines of motion. This effect highlights traffic flow and energy at night.
A steady position is crucial to avoid blurry images. Using a tripod or steady surface will produce sharper lines. Choose locations near highways, busy intersections, or areas with colorful signs. Adjust exposure time based on light levels and movement speed to get clear, defined trails.
Nighttime and Low-Light Tips
Low light challenges require good control of exposure and stability. Nighttime long exposures can capture stars, light trails, or soft ambient lighting. Live Photo’s long exposure feature works well but needs a stable setup.
Use manual focus if possible to prevent blurry images. A tripod or firm base is necessary to keep the phone steady over several seconds. Avoid moving bright lights close to the phone to reduce lens flare. Experiment with different exposure lengths to balance light and motion for the best effect.
Editing and Enhancing Long Exposure Photos
Editing long exposure photos helps improve clarity, adjust colors, and highlight motion effects. Enhancing these images often involves fixing exposure, sharpening details, and balancing light. Proper editing allows the dynamic blur and static elements to stand out clearly for a more striking photo.
Basic Editing Techniques
Start with adjusting brightness, contrast, and exposure to improve overall light balance. Increasing contrast can help make the moving parts more defined against sharp backgrounds. Use the shadows and highlights tools to bring out detail in dark or bright areas without losing texture.
Fine-tuning the white balance ensures colors in the photo look natural. Slightly cooling or warming the photo can enhance the mood. Cropping can remove distractions or improve composition, focusing on the most interesting parts of the image.
Advanced Editing Tools
For more control, use apps that offer selective editing. This allows adjustments to specific areas, such as brightening blurred trails without overexposing sharp parts. Tools like curves or tone mapping help enhance midtones and details in complex lighting.
Noise reduction can be important for night shots, smoothing grain without losing important details. Some apps offer blur enhancement or masking tools to emphasize motion blur selectively. Editing in layers or adjusting masks ensures clean separation between moving and still elements.
Exporting and Sharing
Export photos in high resolution to keep detail and sharpness intact. Choose file formats like JPEG with high quality or TIFF if further editing is expected. Avoid excessive compression, which reduces image clarity.
When sharing, consider displaying photos on platforms that support full resolution images. Adding descriptions or tags about exposure settings and editing tools used can help others understand the techniques behind the photo. Regularly backing up edited photos keeps the original and final versions safe.
Troubleshooting Common Issues
Taking long exposure photos on an iPhone can sometimes lead to blurry images, exposure problems, or app glitches. These issues often have simple fixes that improve photo quality and app performance.
Avoiding Blurry Photos
Blurry photos usually happen because the camera moves during the long exposure. To prevent this, the iPhone should be kept very still.
Using a tripod or resting the phone on a flat surface helps keep the camera steady. Activating the timer can reduce shake caused by pressing the shutter button.
Good lighting is important too. Low light causes longer exposure times, increasing the chance of blur. Adding more light or choosing a brighter scene helps cut exposure time and sharpens the image.
Fixing Overexposure and Noise
Overexposure makes parts of the photo too bright and washed out. This can happen if the exposure is too long or the scene has bright lights.
Using the iPhone’s built-in exposure adjustment can help balance brightness. Tapping the screen and sliding down on the exposure indicator lowers brightness before taking the photo.
Noise appears as grain or speckles in low-light long exposures. Noise reduction apps or shooting in better lighting conditions reduce this problem.
App Crashes or Malfunctions
App crashes often occur if the iPhone’s software is outdated or the app has a bug. Keeping the iPhone and its apps updated reduces crashes.
Force-closing the Camera or Photos app and restarting the phone often fixes temporary problems.
If problems continue, resetting the settings or reinstalling the app may be necessary. Backing up photos first prevents data loss during reinstallation.
Final Thoughts
Long exposure photography on an iPhone opens new creative options without needing advanced cameras. It allows users to capture motion blur in scenes like waterfalls, moving cars, and night skies.
Using the built-in Live Photos feature is a simple way to get long exposure effects. For more control, third-party apps can help by simulating longer shutter speeds and allowing extra editing options.
Stability is key. Users should keep their phone still during the shot, ideally using a tripod or placing it on a steady surface. This prevents unwanted blur and keeps elements like buildings or trees sharp.
Experimenting with different scenes and light conditions improves results. Busy city streets, calm water, and low-light environments offer unique effects that highlight motion in different ways.
FAQs: How to Take Long Exposure on iPhone
What is long exposure photography?
Long exposure is a photography technique that captures motion over time, such as flowing water, moving lights, or clouds, by keeping the shutter open longer.
Can I take long exposure photos on iPhone without any app?
Yes, you can use the built-in Live Photo feature. After taking a Live Photo, open it in the Photos app, swipe up, and select the “Long Exposure” effect.
Which iPhones support long exposure via Live Photos?
iPhones from iPhone 6s and newer (running iOS 11 or later) support Live Photos and the long exposure effect.
How do I stabilize my iPhone for long exposure shots?
To avoid blur, use a tripod, rest your phone on a steady surface, or use a Bluetooth remote shutter or timer.
